Ever seen fresh paint bubble, peel, or turn blotchy after just one wet season? In Cape Coral, that’s usually not a “bad paint” problem. It’s a stucco wall prep problem.
Stucco is tough, but it’s also porous. Add heavy humidity, afternoon rain, salt air, and strong sun, and the wall can hold moisture like a sponge. The goal is simple: get the surface clean, sound, and truly dry so primer can bond and paint can breathe.
Why Cape Coral weather makes stucco prep harder
Humidity slows drying. Frequent rain resets your schedule. Salt carried on coastal breezes leaves invisible residue that can weaken adhesion. Then the sun bakes the wall and pushes moisture outward, which can cause blistering if the coating traps vapor.
Here’s the mindset that works: paint is like a raincoat, but it only works if the person wearing it is dry. If you coat damp stucco, you’re sealing in trouble.
For more background on how Florida moisture affects stucco, review this Stucco Institute summary guide on moisture effects behind Florida stucco systems.
Start with a close inspection (don’t skip this)
Walk the house when the wall is dry and shaded, usually early morning. Look and feel for:
- Hairline cracks at the corners of windows and doors
- Bigger cracks that change width, or run diagonally
- Chalky residue on your hand (paint is oxidizing)
- Dark spotting under soffits, sprinklers, and shaded walls (mildew risk)
- White, crusty deposits (efflorescence from salts)
- Soft or swollen areas (possible moisture behind the finish)
If you find bulging, soft stucco, rust staining, or repeated cracking in the same area, stop and figure out the water source first. Prep can’t fix an active leak.
Tools and materials checklist (what you actually need)
Keep it simple and use the right gear for masonry.
- Garden hose with adjustable nozzle
- Pressure washer (optional) with wide fan tips
- Pump sprayer for cleaner or mildewcide
- Mild detergent, masonry-safe cleaner, or siding wash
- Nylon scrub brush (stiff, not metal)
- Patch material made for stucco (and matching texture tools)
- High-quality exterior caulk (paintable) for small joints
- Masonry bonding primer (for sound, porous stucco)
- Stain-blocking primer (for stubborn staining or efflorescence areas)
- Exterior masonry paint, often an elastomeric or acrylic system
- Painter’s plastic, tape, drop cloths, cardboard shields
If your wall has efflorescence, read a reliable removal process first. This guide on how to remove efflorescence explains the basic approach and why brushing and proper cleaning matter.
Safety, masking, and protecting lanai screens and windows
Cape Coral homes often have big lanais, screen enclosures, and lots of glass. Overspray and chemical mist love to cling to screens.
PPE checklist
- Safety glasses or sealed goggles
- N95 or better mask for dust and atomized cleaner
- Chemical-resistant gloves
- Long sleeves and closed-toe shoes
- Hearing protection when pressure washing
Protection tips that save cleanup time
- Cover lanai screens with plastic sheeting, taped at the frame edges.
- Shield windows with plastic and tape, then add cardboard at the bottom edge to stop runoff streaks.
- Wet down landscaping before cleaning, then rinse after.
- Turn off irrigation while coatings cure, overspray, and water spots are common.
HOA note: Many Cape Coral communities and condo associations require color approval, sheen limits, and work-hour rules. Submit colors early, so your prep and paint window doesn’t get wasted waiting on a form.
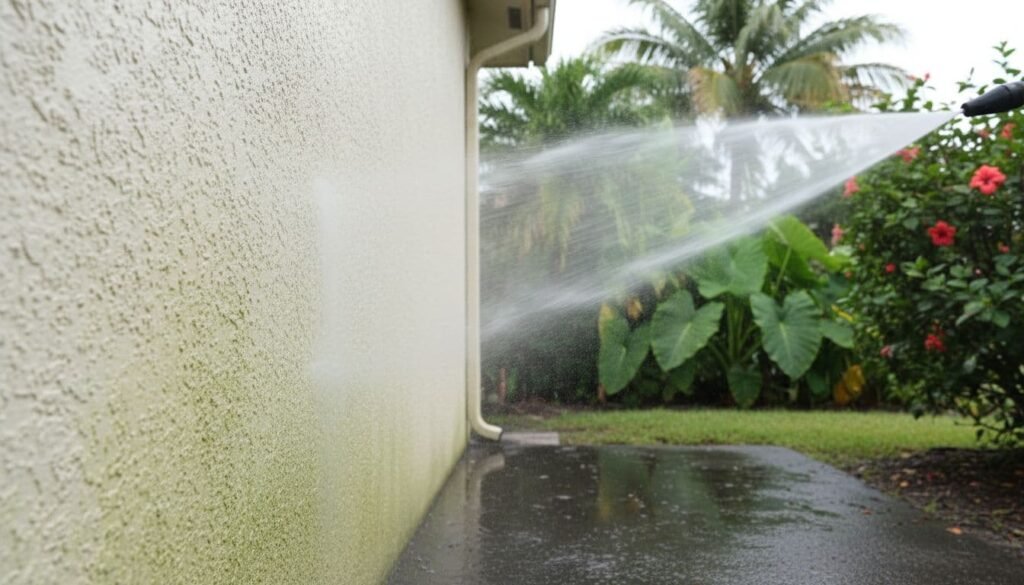
Cleaning stucco without damaging it (mildew and salt included)
Cleaning is where most DIY jobs go sideways. Stucco can be scarred by too much pressure, and scars show through paint.
Best practice: start gently, then step up only if needed.
- Pre-rinse the wall from bottom to top to avoid streaks.
- Apply cleaner or mildewcide with a pump sprayer. Keep the surface wet; don’t let it dry on the wall.
- Light scrub on heavy dirt or algae.
- Rinse thoroughly.
If you pressure wash, use a wide fan tip, keep at a distance, and avoid blasting directly into cracks or around windows.
Do and don’t rules (especially for humid Florida)
- Do clean mildew with a product labeled for exterior surfaces, and follow dwell time guidance.
- Don’t “wing it” with strong bleach mixes. Too hot a mix can damage plants, stain surfaces, and leave salts behind.
- Do rinse until runoff water looks clear.
- Don’t paint the next day just because it “looks dry.” Humidity can leave moisture inside the wall.
Repairs and surface conditioning (where durability is won)
After cleaning, let the wall dry, then repair. Don’t patch wet stucco.
- Hairline cracks: often get bridged by elastomeric coatings, but you still want them clean and stable.
- Larger cracks and chips: use a stucco patch product, rebuild in thin lifts, and match the texture.
- Gaps at penetrations: seal with a paintable exterior sealant where appropriate (light fixtures, pipe penetrations). Don’t caulk weep screeds or drainage paths.
Handle chalking and efflorescence the right way
- Chalking: If paint dust rubs off heavily, washing alone may not stabilize it. This is when a masonry bonding primer helps lock down the surface.
- Efflorescence: Remove it before priming. If it returns, there may be ongoing moisture movement. In those areas, a stain-blocking primer can help after proper cleaning and drying.
A realistic Cape Coral timeline (with humid-air wait times)
Humidity adds time. Plan for weather delays, especially in rainy months.
| Step | What you do | Typical minimum wait in humid conditions |
|---|---|---|
| Protect and mask | Cover screens, windows, landscaping | Same day |
| Wash and treat mildew | Apply cleaner, scrub, rinse well | 24 to 48 hours drying |
| Repairs | Patch cracks, replace loose areas | 24 to 72 hours (per product label) |
| Spot prime repairs | Prime patched and stained areas | 2 to 6 hours (longer if humid) |
| Full prime (if needed) | Prime porous or chalking stucco | Overnight is safest |
| Topcoat paint | Apply 1st coat, then 2nd | Follow label recoat times, often 4 to 24 hours |
New stucco or large cement repairs may need a much longer cure time before coating. Follow the repair product and paint system instructions.
Primer and paint types that work better on coastal stucco
You don’t need a magic brand; you need the right chemistry for masonry.
- Masonry bonding primer: Best for sound stucco that’s porous or slightly chalky. Helps adhesion and evens suction so the finish coat doesn’t dry patchy.
- Stain-blocking primer: Useful for stubborn stains, tannin-like discoloration, or areas prone to efflorescence, after the salts are removed.
- Elastomeric topcoat: Often chosen for stucco because it can bridge tiny cracks and shed wind-driven rain, while still allowing some vapor movement (read the product data sheet).
“Ready to prime” checklist (quick go/no-go)
Before primer touches the wall, confirm:
- Wall is clean, with no dusty residue when you rub it
- No visible mildew, algae, or greasy staining
- Cracks are repaired, and patches are sanded or textured to match
- Efflorescence is removed, and the area is dry
- Caulk is cured and tool-smoothed
- Masking is tight around windows, lanais, and fixtures
- Forecast shows a dry window for your primer and cure time
If you want more guidance on planning an exterior project around local conditions and want professional help, reach out, and check out our exterior painting page.
Informed Stucco Prep
Good stucco wall prep in Cape Coral is less about speed and more about timing, dryness, and repairs. Wash carefully, fix obvious issues, let the wall dry longer than you think, then prime with a product made for masonry. The payoff is a finish that holds up through humid summers, salt air, and sudden rain.
Always follow product labels, HOA rules, and local requirements for chemical use, runoff, and ladder safety. If the wall shows ongoing moisture problems, fix the source first, then paint.